July 25, 2007
-
Numbering the Years, er Tables
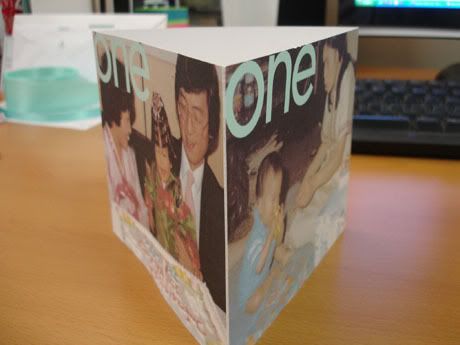
Our table numbers/menus are done! I did a simple tent card, since three sides are perfect for a pic of me [at the same age as the table number], a pic of him, and the menu. It’s great since it can stand on its own, too. No need to find, buy, rent, or borrow any of those [mostly] banal table number holders out there. Yes, yes, there are creative, beautiful stands for table numbers that don’t have to break the bank, but this lazy bride didn’t even want to bother searching, budgeting or wasting even one extra brain cell on it (they are a rare resource, since bridal brain has kicked in, after all). I have a large ream of beautiful, bright white cardstock that I bought for under $20 at Kelly Paper for miscellaneous paper projects such as this, so I set out to do something using only my computer, that paper, an inkjet printer, and minimal other supplies. I came up with the following.
Tower o’ numbers:

Tri-cornered goodness:
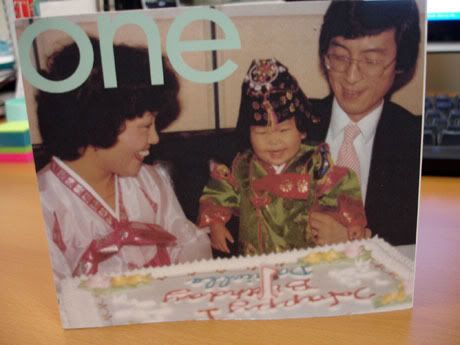
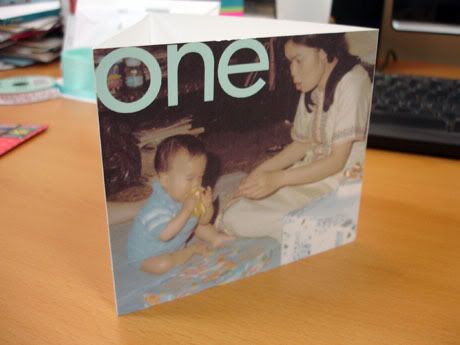
Sides 1+2: Fatty McTaterstein + Bow-eating Bear
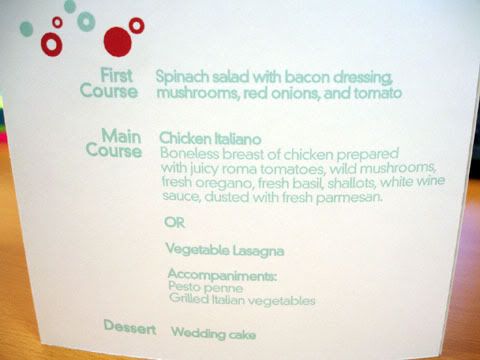
The Menu
And now for the how to on what has probably been the easiest DIY project to date.
- I laid out an 11×17 (tabloid) sized sheet in Adobe Illustrator. I wanted to get 2-3 out of each sheet of paper but still have each table tent a decent size. I ended up with 2 per 11×17, landscape oriented sheet. Each table tent, flat, measured 17″ wide x 4.5″ high. Since the printer I was planning on using doesn’t print full bleed, the artwork took up about 16″ wide by 4.5″ high each. The extra, blank half inch became a tab to which I affixed double stick tape to hold the thing folded together.
- My wonderful former roommate printed them out for me on her Epson inkjet printer that can print up to 11×17 size. The one at work broke a few days before I finished designing the layouts, of course, and my company decided not to replace it until we move (a month after the wedding). And yes, I had my boss’ permission since it was only 10 pages total (20 tables, 2 numbers per sheet).

- A friend and I cut each one out, to get the full bleed look.
- Said friend and I scored each into thirds, plus a little score line at the end for the 1/2″ tab.
- I folded each, used double stick tape on the tab, which was stuck onto the back of the other end. Voila!
- Bonus tip #1 – Find a larger format inkjet printer if you can, over a color laser. The color lasers at Staples and Kinko’s just don’t cut it when you’re trying to print photos. I did some test plots there before bugging my old roomie, but the photos came out horribly. Photo printers (I know, still technically inkjet) work even better, but it’s hard to get a hold of one that can print up to 11″ x17″.
- Bonus tip #2 – If you don’t have access to anything that can print pages this large, you can also do tall, skinny table tents made of an 8.5″ x 11″ sheet of paper folded in thirds.
- Bonus tip #3 – If you’re as cheap as me, buy a ream of 11″ x 17″ and have Kelly Paper cut some of it down to 8.5″ x 11″ for you. They’ll usually do it for free as it’s just cutting it in half. You get double the number of sheets, if you cut the whole ream in half, for less than the price of buying two reams of 8.5″ x 11″.
I’m really happy with the way they turned out. Especially since this is the first DIY project that the bear has truly been impressed with. My only concern is if it comes in contact with something wet or someone spills, but I figure that my guests will have already found their tables by then.
Comments (10)
wow these are neat!
those are awesome!
sooo creative!
very cool! I like how the pictures make the table numbers so personal.
p.s. are you on wedding bee? You should really submit this to their DIY contest!
I am LMAO at the “are you on wedding bee?” comment. Great work, dear.
That is a REALLY great idea, with the pictures to coincide with the table number, PLUS it doubles as a menu…AWESOME!! You did a great job!
what a fantastic idea!!! they look awesome!
Aw! Those are totally awesome! A great alternative to boring ol’ numbers.
Those are too cute!! and you personal! your guests are going to love those:)